Sidenote : This is the part 12 of the ASP.Net MVC course series. You can get all the parts of this tutorial here.
Till last chapter, we have added movie information to the database and printed the list of movies. Now, let us write some code to update the existing data. In the later part of this chapter, we will see how we can delete the data.
We’ll change the Index view so that we can have Edit option against each of those movies.
In the below updated Index View, I am looping through the movie list and creating a row for each movie in an html table. “table” class of bootstrap is used for styling the table.
As discussed earlier, @Html.ActionLink would create hyperlink(<a> html element). The first parameter represents the string to be displayed, second one is for Action name and third one is for passing any additional information that you would like to pass. We are passing ‘id’ value to Edit action method – so that we can pull the respective movie information from database and show it to the user for editing the same.
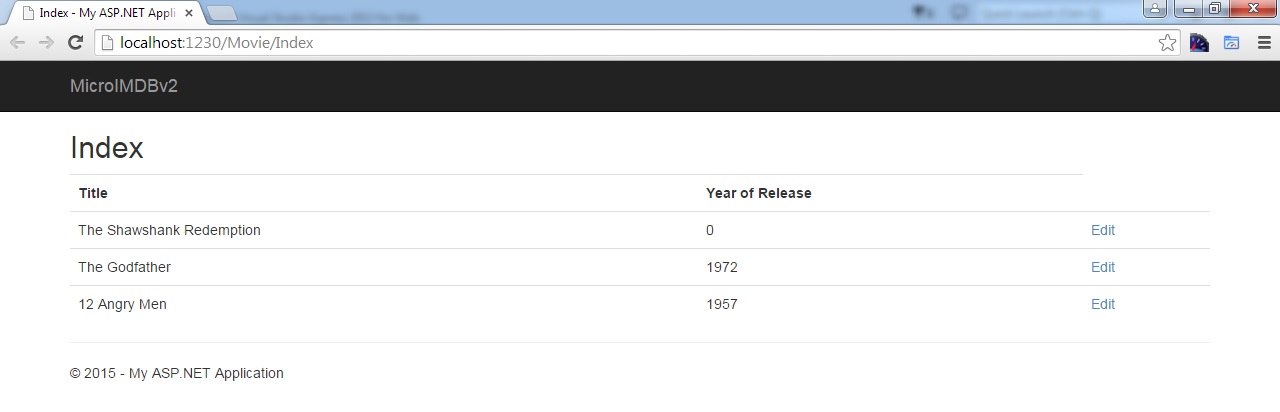
When you run the application and access the http://localhost:1230/Movie/Index URL, you will get the screen like below
User will click the Edit link to update the movie information. Upon clicking this Edit link, we will be showing another page with the movie information where he can update the move information and submit.
Sidenote: “The Shawshank Redemption” movie is added before we have Validation. That’s why we were able to enter “Year of Release” as 0.
Now, let us write Edit action method – which would be called when user clicks Edit link.
We are getting the id value when user clicks the Edit link in the Index view. Find method would get you the Entity object based on the id passed. If the id is not available in the database, we are returning the HttpNotFound error. If we are able to find the respective movie information, we are passing that information to the View(Edit view – which we are going to create).
Right click inside the above Edit action method and select “Add View” option from the context menu.
In the generated Edit view, I have copy-pasted the entire content from Add view to here and have made the following changes
- Change the action method in Html.BeginForm to “Edit” – so that it would call Edit action POST method(yet to create) upon submitting the form
- Update the Heading and Submit form text from “Add” to “Edit”
The completed Edit view code is attached below
When you click the Edit link, you may get the screen like below

Now, we’ll write the code for what needs to happen when you submit the form – Edit action POST method which would save the updated information to the database.
Just like in Add POST method, we would be verifying whether the Model is valid in Edit POST method as well. But the difference lies in what we do after validating – how the object is managed in context.
In Add action method, we would be adding the newly added movie object to the context and when you call SaveChanges method – it will save the newly added movie object to the database.
But in Edit POST method, we would be changing the state of the object to Modified in Context – so that Entity framework knows this object already exists in database and it needs to run the update query instead of insert query. And when you call SaveChanges of DbContext, it will save/update all pending modifications to the database.
Below is the complete code.
Deleting the movie:
Deleting the movie is bit similar to ‘Edit’ operation. We need to follow the below steps
- Create Delete GET action method – where we get the movie information (for the id we got from view) and pass it to the Delete View
- Create the Delete view – where we show the movie information and user can delete the movie by clicking the “Delete Movie” button. Upon clicking this button Delete POST action method would be called.
- Create Delete POST action method – where we delete that movie information from the database.
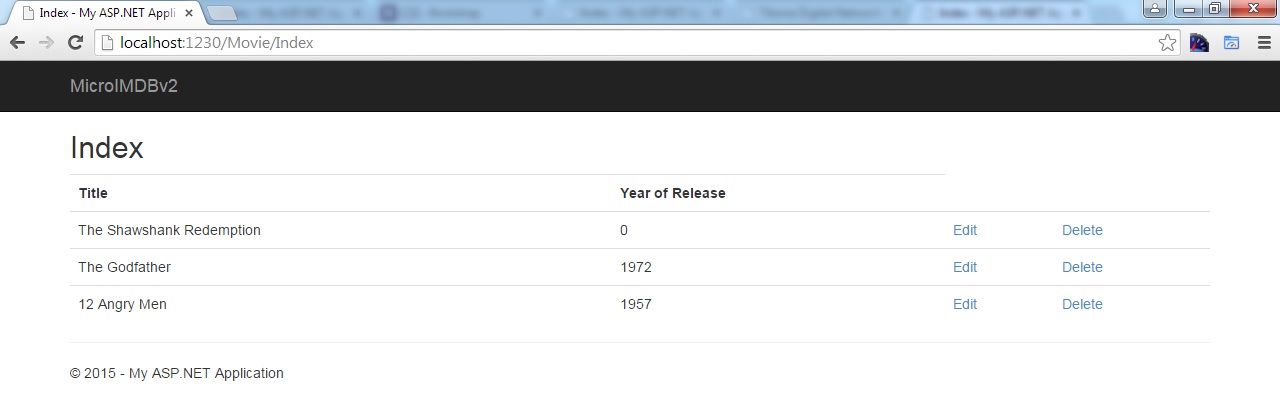
But before any of the above mentioned steps, we need to update ‘Index View’ for adding Delete link for each of the movie
When you run the application and access the Index action, you’ll get like below
Let us see the code for each one of the above steps
- Create Delete GET Action method:
Below is the Delete action GET method. There is no difference between this Delete GET method and Edit GET method except the name of the methods. In both methods, we are getting the movie information from the database and passing that to View.
- Create Delete View:
Right click inside the above Delete GET action method and select “Add View” in the context menu. As usual, select the Model “Empty (no models”) in the template.
I have just copy-pasted from Edit View and have made the following changes
- Changed the Action method from “Edit” to “Delete”
- Changed Heading(<h2> tag inside the form) and button text from “Edit” to “Delete”
The complete code is given below.
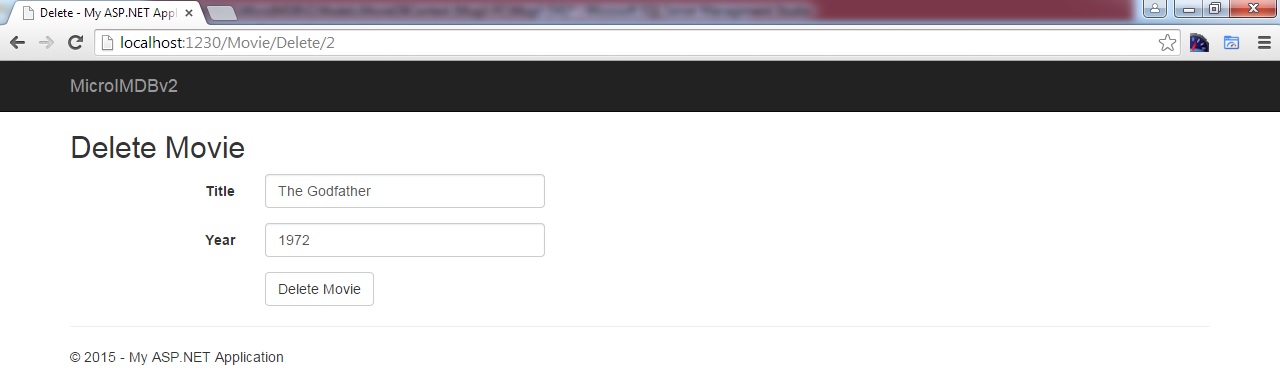
When you click the Delete link, you may get the screen like below
 3. Create Delete POST action method:
In Edit POST method, we have changed the Entity state to ‘Modified’. Now, in Delete POST method, we are going to set the Entity state to ‘Deleted’. When you call SaveChanges method, Entity Framework will fire a delete query and delete the record in the database.
Upon successful completion of deletion, we are showing the list of movies to the users.
[button type=”flat” shape=”square” size=”large” href=”https://www.dotnetodyssey.com/asp-net-mvc-5-free-course/validation/” title=”Previous chapter”]Previous Chapter[/button] [button type=”flat” shape=”square” size=”large” href=”https://www.dotnetodyssey.com/asp-net-mvc-5-free-course/” title=”Home”]Home[/button]