Sidenote : This is the part 8 of the ASP.Net MVC course series. You can get all the parts of this tutorial here.
From this chapter, let us build our application, MicroIMDBv2 – which would be similar to popular movie website IMDB but on a very smaller scale. We are going to build this web application incrementally so that you can know what happens at each step.
Fire up Visual Studio Express for the Web and create New Project.
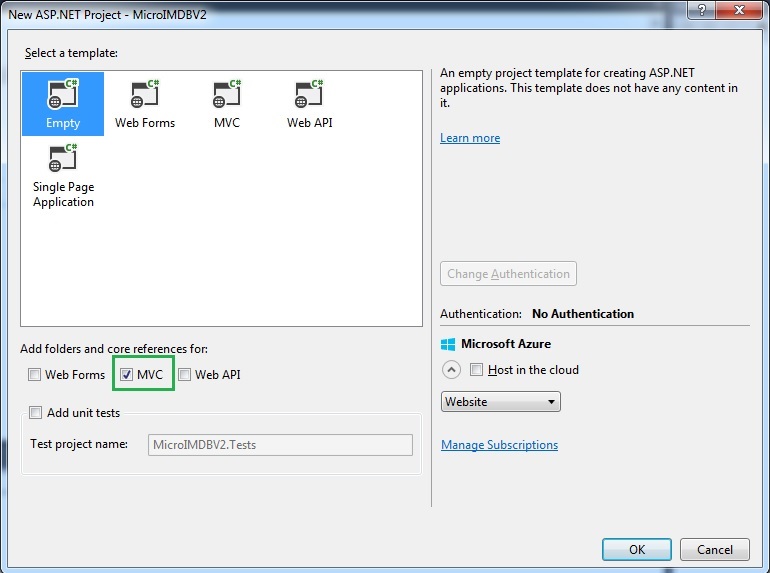
Select Empty template and check ‘MVC’ for adding relevant folders for the same and click OK.
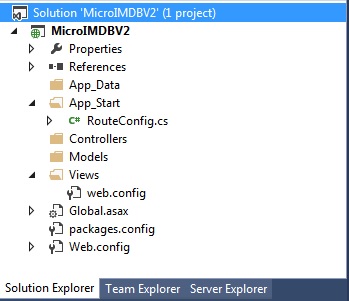
Project creation would be successful and you’ll get the following structure.
Installing Entity Framework:
We would be storing the data in SQL Server Express database and we would be using Entity Framework Code First approach for doing the same. First, let us add the ‘Entity Framework’ to our project.
Goto Tools -> NuGet Package Manager -> Package Manager Console
You can install ‘Entity Framework’ by giving command ‘Install-Package EntityFramework in Package Manager Console. It‘ll download and install the latest stable version of Entity Framework in your project.
Adding Movie Controller:
Let us add a controller by name ‘MovieController’. This controller would be responsible for adding movies, updating movie information and deleting the movies from the database. Each of these functionalities would be achieved by different Action methods in Movie Controller.
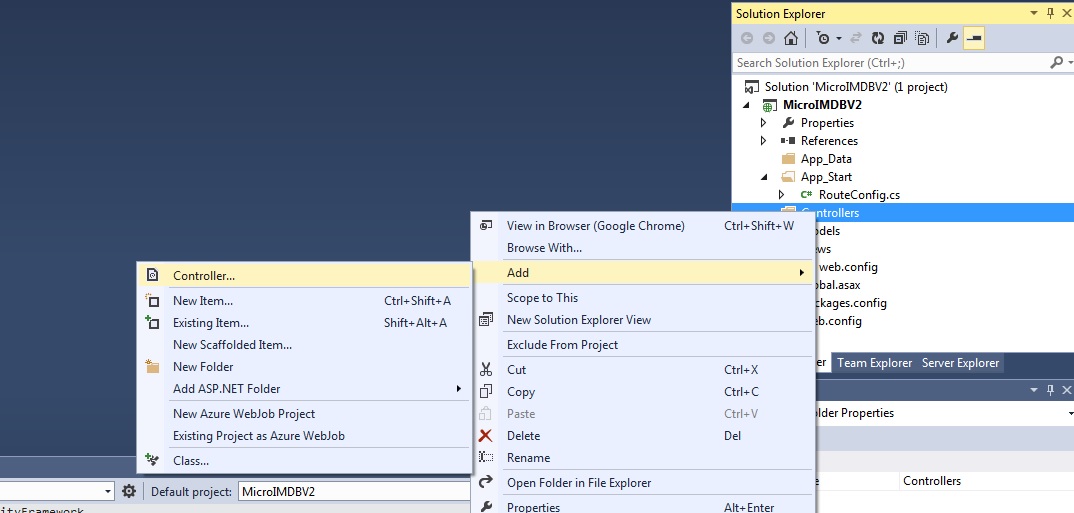
Right click Controllers and Select Add -> Controller
Select ‘MVC5 Controller – Empty’, as we want to handwrite everything and click Add. This would make us to understand the intricacies of ASP.Net MVC application. Once you are bit experienced, you can choose the options and scaffold would write code for you.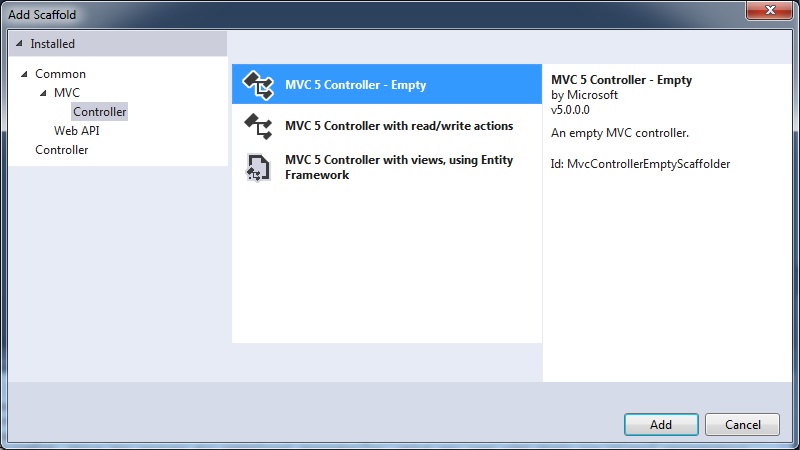
Name the controller as ‘MovieController’. As ASP.Net MVC follows conventions, the name of the controller should end with ‘Controller’. Else, ASP.Net MVC would not be able to recognize it.
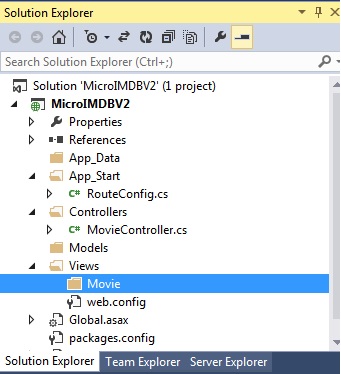
When you click ‘Add’, it will create MovieController.cs in the Controller folder with the following content. This Index action method could be used for listing the movies.
public class MovieController : Controller

{

        // GET: Movie

        public ActionResult Index()

        {

            return View();

        }

    }
And an empty folder by name ‘Movie’ would be created in Views folder.
Adding Index View:
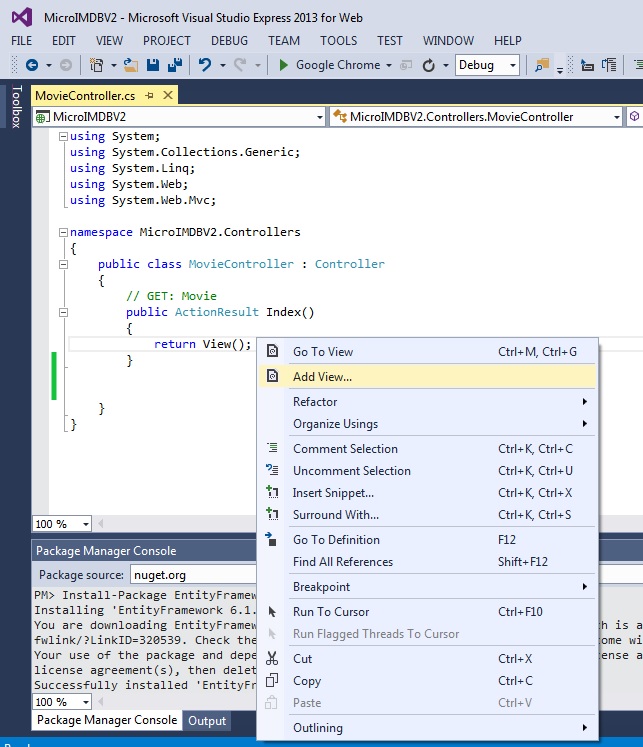
Right click inside Index method of MovieController and select Add View.
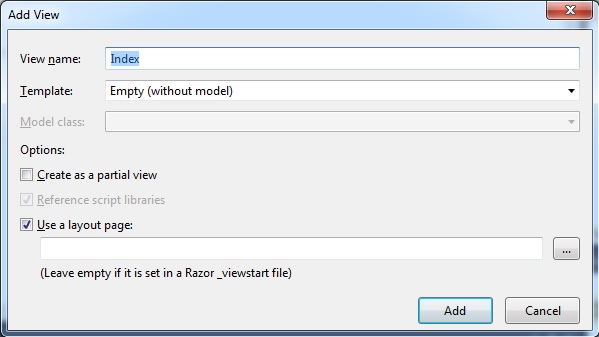
Options in Add View:
View name: By convention view name should be same as your Action method. So we are going to leave it as it is.
Template: Select ‘Empty (without model)’ option as we are going to handwrite everything.
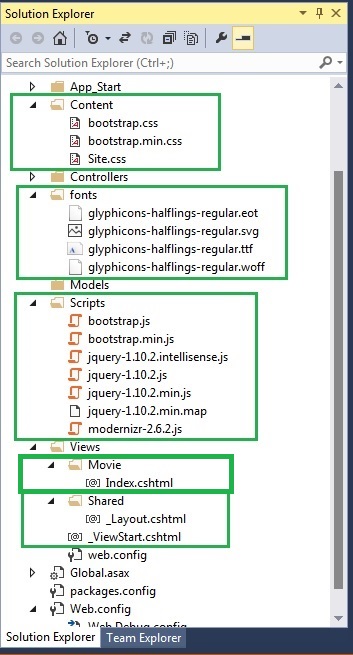
When you click ‘Add’, many files are being added within newly created folder.
Let us see the significance of each of the file.
- Content folder is created with following 3 CSS files
- bootstrap.css – Which provides the Bootstrap UI styling for our web application. You can change any CSS property in this file to change any styling. Changing bootstrap or extending it is out of scope of this guide.
- bootstrap.min.css – This is the minified version of the bootstrap.min.css with all the white spaces removed and variable names shortened. This would reduce the size of the delivered file and will thus decrease the load time a bit.
- Site.css – This file is for customization with respect to our web application. ASP.Net MVC customizes properties for body and a couple of other classes here.
We are not going to customize any CSS properties of the generated bootstrap UI framework of ASP.Net MVC and we are going to use it as it is.
- Fonts folder is created with glyphicons fonts. Glyphicons provides the icons and fonts which comes with bootstrap framework for free.
- Scripts folder is created with following files
- Bootsrap.js and bootstrap.min.js – These are the javascript files which provides the UI event functionalities when using bootstrap UI with the minified version.
- jquery-*.js – Functionalities of bootstrap depends on jquery library. So, ASP.Net MVC includes jquery file with its minified version.
- Modernizer.js – This javascript library performs feature detection in browser.
- Shared folder is created under View Folder with _Layout.cshtml file in it. This layout file defines the layout of the application. The generated file contains navigation bar, footer and other sections. We are going to use this layout with little modification.
As mention in earlier chapter, more than 1 layout files can exist in an ASP.Net MVC application and you can use them according to your needs
- ViewStart.cshtml : This file tells you the default layout being used in the application so that you don’t need the specify the layout in each of your view.
Below is the content of the generated _ViewStart.cshtml file – it points to _Layout.cshtml in shared folder
@{

Layout = "~/Views/Shared/_Layout.cshtml";

}
- cshtml – Actual View of Index action with the following content
@{

ViewBag.Title = "Index";

}

<h2>Index</h2>
Changing RouteConfig :
When you create ASP.Net MVC project, it will create an initial route by name ‘Default’ in App_Start\RouteConfig.cs. This controller will look for Home controller by default.
Now, we’ll change it to look for Movie controller by default.
Update code with Movie controller as default
routes.MapRoute(

name: "Default",

url: "{controller}/{action}/{id}",

defaults: new { controller = "Movie", action = "Index", id = UrlParameter.Optional }
Run the application and you’ll get the following web page. Voila!
Even if you access the following URLs, you’ll get the same web page – as the ‘Default’ route would use Movie as default controller and Index as default action method.
http://localhost:1230/Movie/Index
Summary:
In this chapter, we saw how to setup the ASP.Net MVC application. And we have discussed about the significance of each of the components in our project.
[button type=”flat” shape=”square” size=”large” href=”https://www.dotnetodyssey.com/asp-net-mvc-5-free-course/css-and-twitter-bootstrap/” title=”Previous chapter”]Previous Chapter[/button] [button type=”flat” shape=”square” size=”large” href=”https://www.dotnetodyssey.com/asp-net-mvc-5-free-course/” title=”Home”]Home[/button] [button type=”flat” shape=”square” size=”large” href=”https://www.dotnetodyssey.com/asp-net-mvc-5-free-course/data-modeling/” title=”Next Chapter”]Next Chapter[/button] [x_subscribe form=”398″]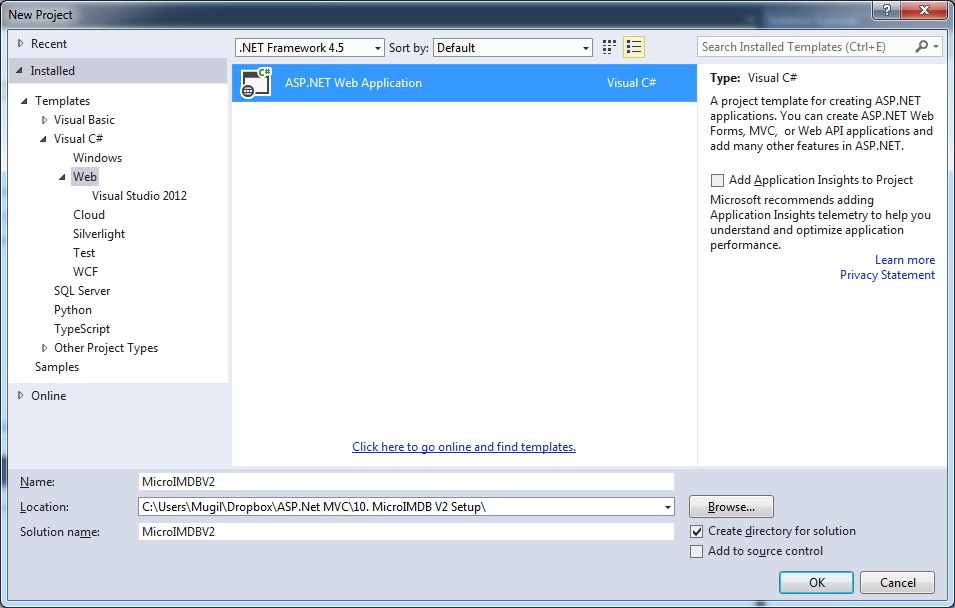



Leave a Reply